Friday, July 22, 2011

Not far to go now...

Last night:

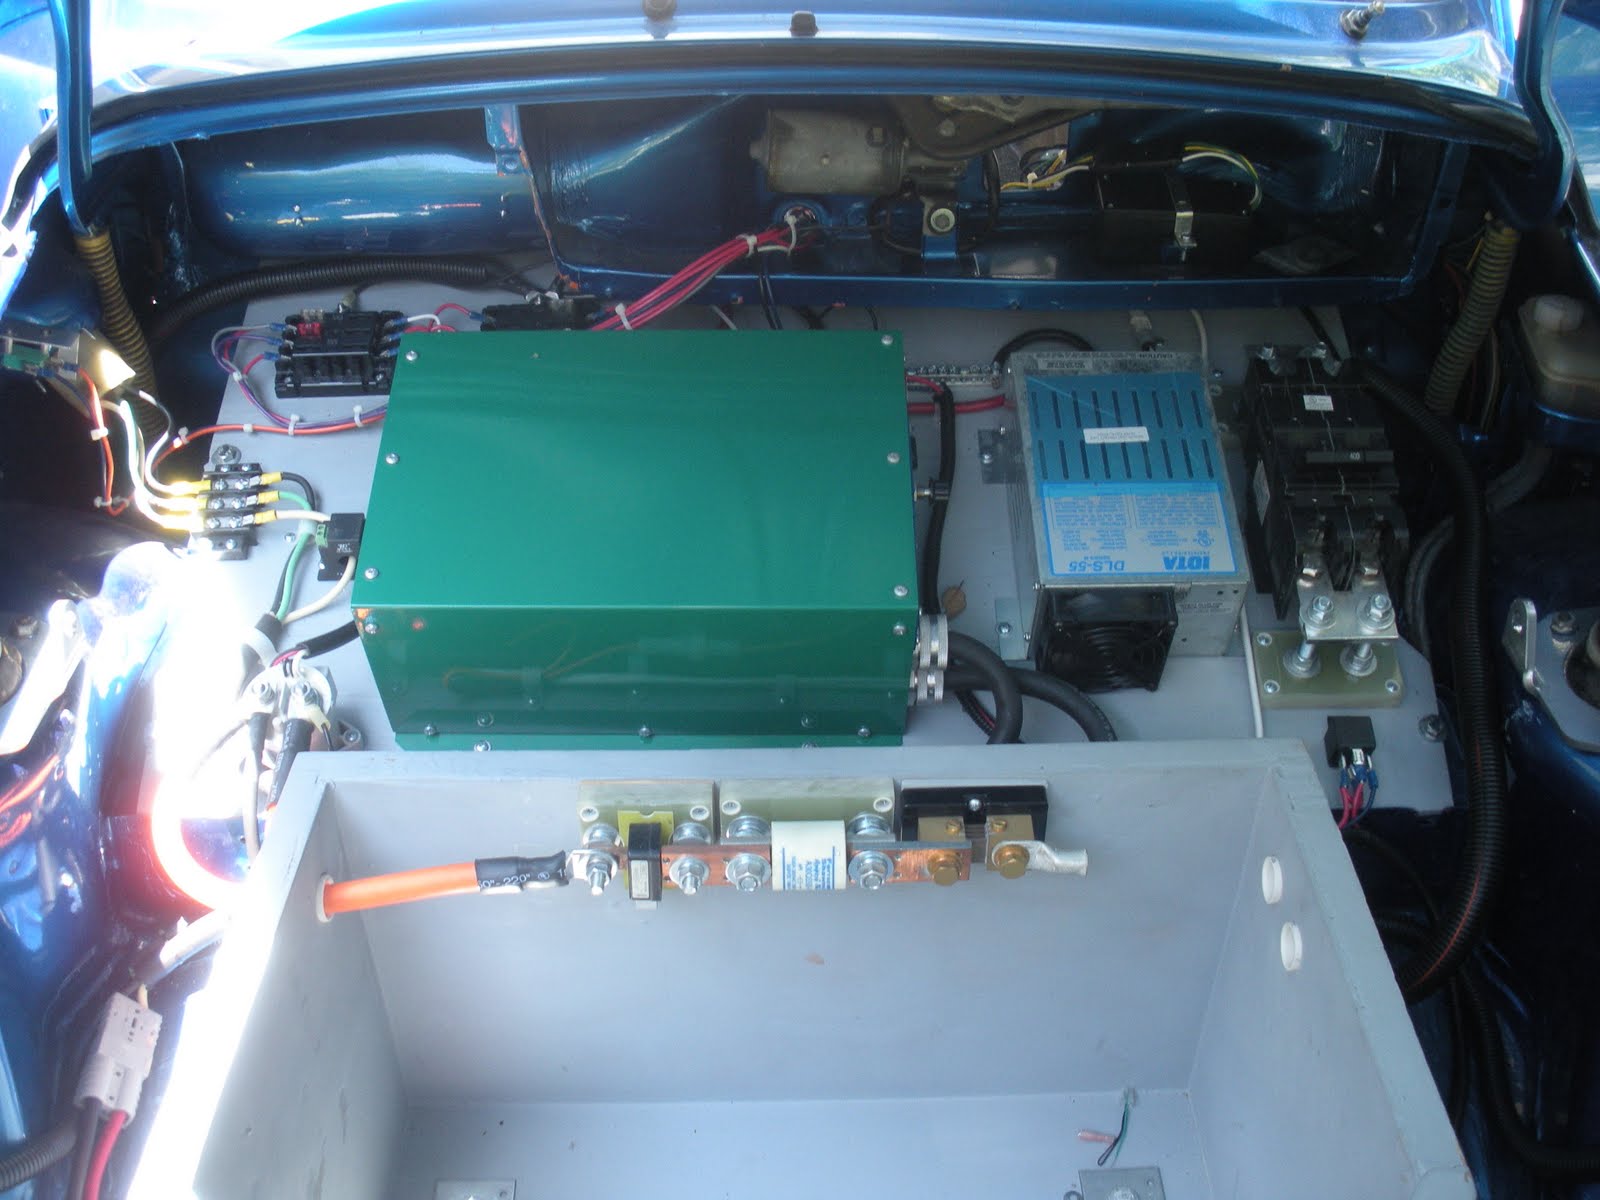
  • Cabled up front battery box fan to 12v DC power supply that comes on when car is plugged in
  • Cabled up said power supply AC power to power cord inlet
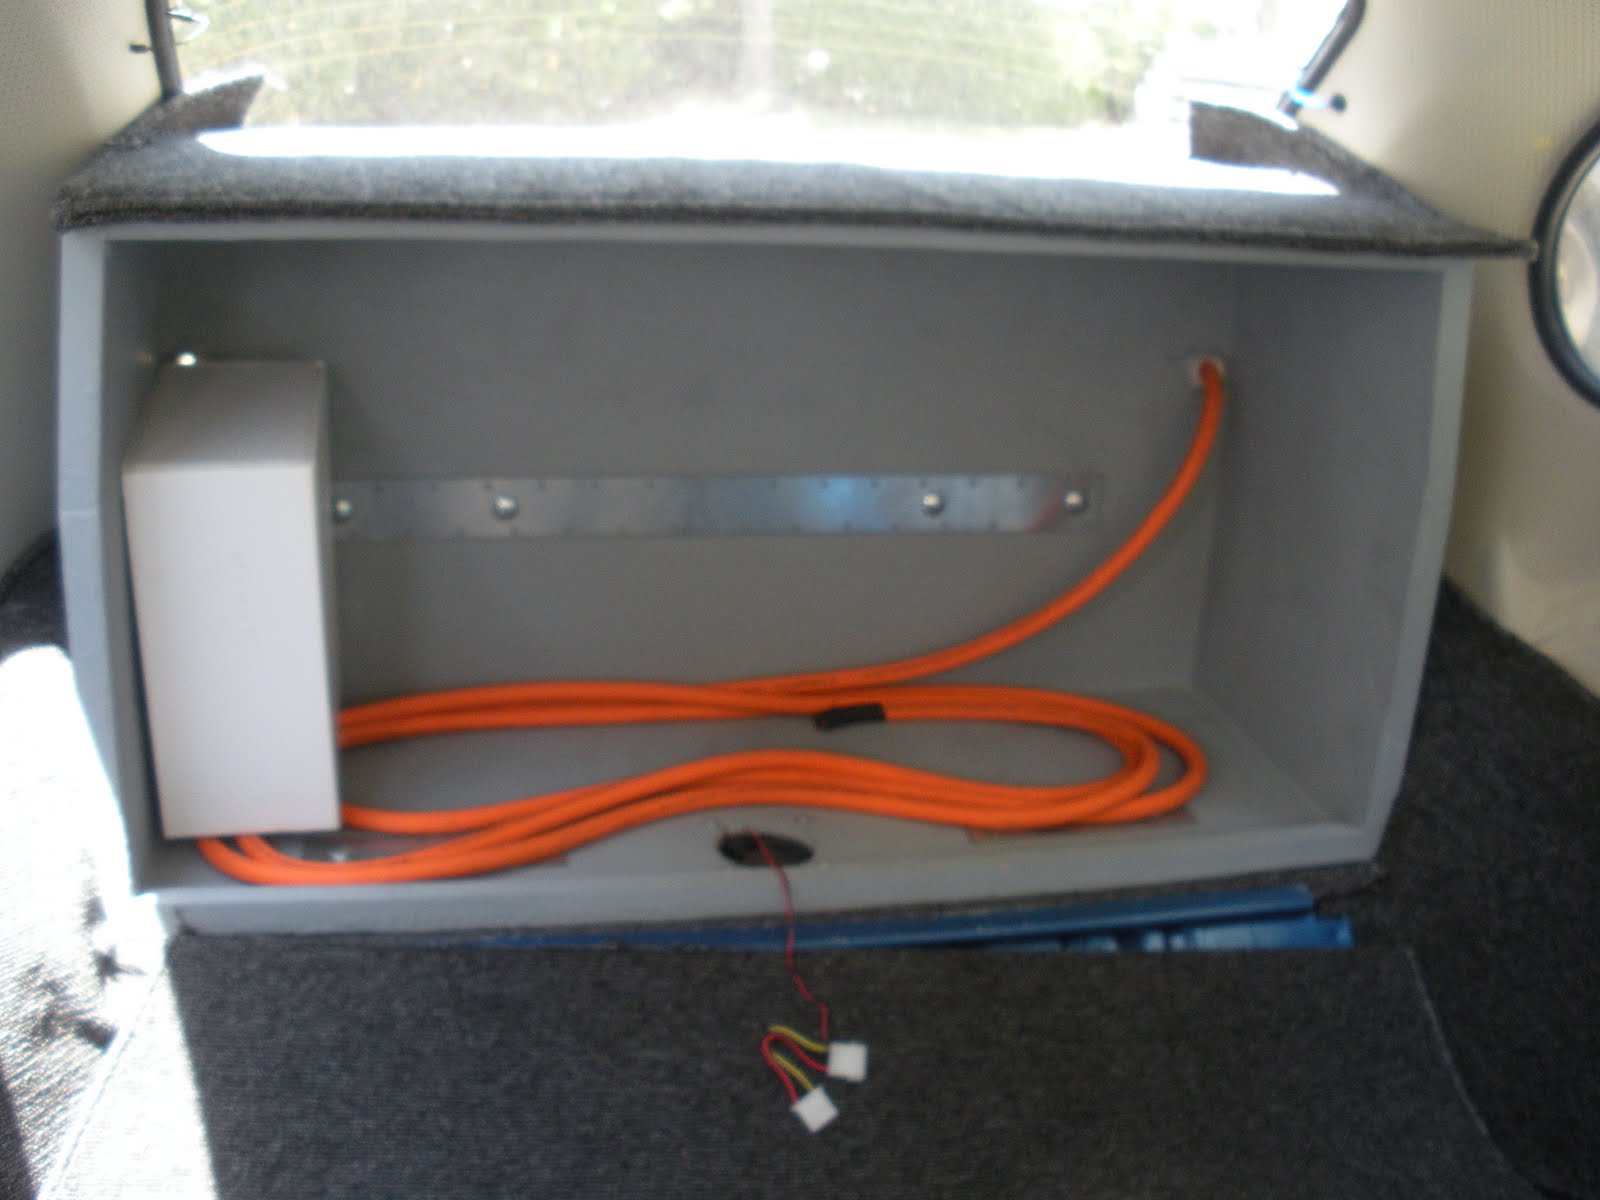
  • Bought extension cord to use as car charging cord, cut end off and attached L5-30 socket

Everything works.

Next:

  • Remove dashboard again, figure out how to install EMS LCD where the Link10 used to go
  • Cable up motor loop current sensor and connect to Motor Amps meter on dashboard
  • Cable up temperature sensors and attach to temp display meter on dashboard
  • Figure out Hazard switch wiring
The EMS computer and remaining bettery interconnect straps for the rear battery pack shipped yesterday and I should get it all on Monday.

Maybe I should put some food out for Mr. Rat to make him come back? It's just not the same without him.

Wednesday, July 20, 2011

The first iPad test

My original plan was to use a Windows PC with a touch-screen monitor to run ZillaView (written by Claudio Natoli down under). The motherboard I got my hands on has four serial ports, and the Link10 and PakTrakr both have serial ports that spew useful data, so my thought was to gather all of this data and make some kind of display for all of this. Exactly how I was going to do this was to be figured out later, as long as I had the PC hardware in the first place.

Well, I still have the Zilla, but it looks like the Link10 is going to be redundant, with its functionality replaced by the Lithium Ion battery EMS display from Elite Power Solutions. And the PakTrakr was designed for lead acid batteries which I am no longer going to use now that I have the LiOns. The whole PC thing started to get unnattractive, especially since there are so many pieces involved. I was impressed by the size, simplicity, and power of my wife's iPad so I wondered if there was a way to use one of those instead. I did some research and found a serial port app that didn't require jailbreaking the iPad, so I bought an iPad, the serial to docking port cable, and the "Get Console" app.

When I installed the wiring harnesses I included a data cable that runs from the Hairball serial port to a DB9 connector behind the dashboard. Last night I decided to power up the Hairball with one of my laptops connected to the serial port to see if I could get it to talk. Although I do have a serial port cable that goes directly from the Hairball to a laptop, I decided to just skip that step and see if my harness serial cable would work. It did! The Zilla configuration menus popped up in HyperTerm. My cable worked fine.

I then went and got my iPad and brought it out to the workbench in the garage. The Get Console cable has an RJ45 connector that is designed for Cisco Router consoles, so a quick google search gave me the pinout. I created an RJ45 to DB9 adapter (with a little help from the oscilloscope), stuck it on the cable, and hooked the iPad up to the car. I fired up the Hairball and - success! Zilla configuration menus on the iPad.

So for now I can at least monitor the controller status with the iPad while driving the car. I'll put the Hairball into DAQ mode, which spits out ten lines per second of hex values, so I'll have to get used to deciphering that, but hey, I'm a nerd. Then maybe I can talk real nice to my wife and convince her to write an app for the iPad that makes a prettier and more friendly display...

Still no sign of Mr. Rat, BTW.

Monday, July 18, 2011

The batteries are no longer in the garage

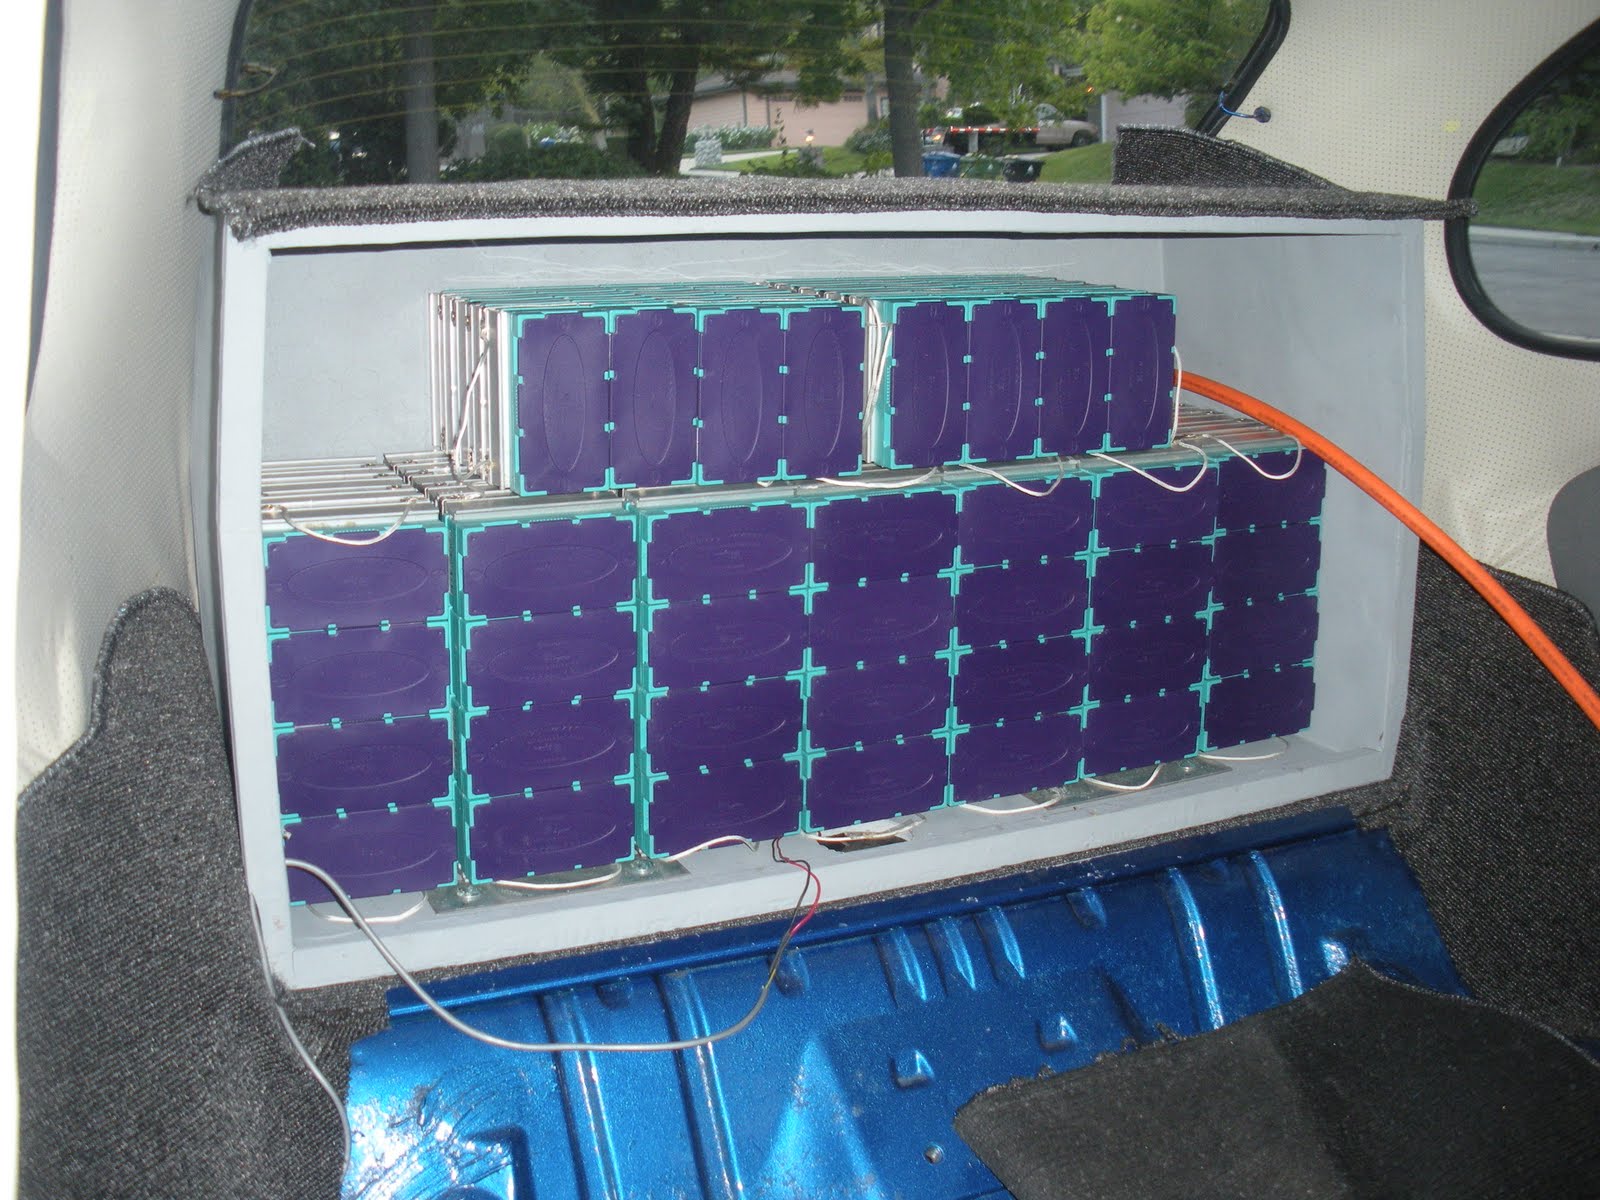
I was messing with the batteries in the garage over the weekend, trying out the inter-battery connection straps to see which ones I was going to use (Rick at EPS sent me a bunch of different ones to try). I wanted to figure out what direction the batteries should face in the boxes so that things fit together nicely and to make sure that the front-to-rear cables didn't tangle up with each other. One thing led to another and I ended up putting the front batteries into the car and cabling them up, completely. Next thing I knew the front battery pack was finished. I came to the realization that the cell monitoring boards have to be installed with the batteries in the car and the interconnects installed, so what the heck, get it over with.

Undeterred by my progress, and finding time on my hands, I got to work on the rear battery pack. As long as the front batteries were already installed, I wanted to get the rear ones in so that they all could sit through day and night under the same environmental conditions so they all age the same. Kind of like bottles of wine...

The rear battery pack has the batteries on their sides, facing the interior of the car, so they need some kind of securing structure across them to keep them from falling out of the box if you slam on the brakes. I designed and built some confinement bars to do this. Now I am waiting for the next shipment from EPS, with the remaining interconnect straps and the monitoring computer thingey.

I also cleaned up the last of the rat mess in the motor compartment. I miss him.

Tuesday, July 12, 2011

Waiting for the computer

The batteries came with an EMS (Energy Management System) which is Marketing-speak for a bunch of little circuit boards that mount on each battery cell and are daisy-chained to a little microcontroller (which EPS calls the "computer"). The computer gathers voltage and temperature information from all the cells and drives a little monitor (an automotive backup camera display) to show the stats. It also has outputs for low and high voltage alarms, which is a good thing when you have a pack of Lithium Ion cells.

The installation sequence is as follows:

1. Install and wire up the "computer"
2. Install the cell monitoring boards onto the battery cells
3. Install the batteries
4. Cable up the cell monitoring boards to the computer
5. Install the main battery power cables
6. Drive around

The computer thingey is back-ordered, so you can see how that may affect my first test drive by looking at the list above.

Rat update - no rat. I removed the traps and the sticky pads on Sunday. When Mr. Rat sees that the coast is clear, he may come back, at which point I can pounce into action with whatever new hair-brained trap idea I can come up with. The little devil on my shoulder whispering into my ear tells me that I want to finally see his cold little body. The little angel on my other shoulder whispering into my other ear tells me that Mr. Rat is probably a daddy and has a little rat wife and little rat kids and as long as he's gone from my car the cosmic karma can stay in balance. Darn it, sometimes it's no fun being a Taoist.

Sunday, July 10, 2011

Oops too much coffee I guess.

Ok I admit it, that was a dog toy. I must be getting desperate for an end to my rat problem.

On a more productive note, today I installed the small 12v power supply that comes on when the charging cord is plugged in. This powers the battery box ventilation fans and the AC current meter for the PFC-20 charger. I also installed the backup alarm beeper and wire brushed the rust off of the front disk brake rotors.

And it's my wife's birthday today - happy birthday, honey!

Mission Accomplished.

Today is a day of victory. I have vanquished my foe. My morning started early. I could not sleep any longer, having an epiphany in the last vestiges of a particularly lucid dream state. I had the key - coffee. I know that coffee makes me smarter. I've noticed that when I have several cups within a short period of time (what other people, especially the jealous neurotic ones, would say is "too much") I can drill my way to a brilliant solution to a complex problem easily. As the morning sky gradually blossomed into daylight, I re-positioned the trap to what I finally, through my new insight,  knew to be the habitual path of my enemy. I would then wait and check again later.

I got the Sunday paper and read the whole thing. I went into the back yard and skimmed the pool. I went into the garage and built up some brackets for the charger current meter and back-up alarm beeper. I figured that since it had been five minutes, I should go and check the trap.


Thursday, July 7, 2011

Test Fit of the Batteries

Amy and Shelley had a Basketball game today, they won 20-17. Yay!

After we got home, I moved the batteries into the battery boxes to see how they would fit. Keep in mind that these battery boxes were originally designed for twelve Odyssey PC1500 AGM lead acid batteries, four in the front box and eight in the rear box. The boxes were specifically sized to exactly hold these batteries with very little room to spare.

The GBS 100AH 4-pack Lithium Ion batteries are a bit smaller so I got 14 of them (more voltage = better performance). It turns out that I can fit five in the front box and nine in the rear box, perfectly, with a little room to breath to boot. The GBS dimensions have nothing to do with the AGM battery dimensions, but due to some cosmic serendipity they fit in my boxes as if the boxes were designed around them. I'm sure that there will be some interconnect cable drama ahead, but I know that I will figure it out. I always do :)

Here are some pics:

Another Rat-free day.

Next step: figure out where the batteries go.

I don't need to make fake batteries out of foam board to do this, they're light enough that I can use the actual batteries for fit tests. Light is good.

Tuesday, July 5, 2011

The Batteries in the garage

Important update

In order of importance:

1) Still no rat
2) The batteries have arrived.

Monday, July 4, 2011

Another Rat-Free Day...

The dashboard that I've put in the car is intended to be temporary. I want to install as many electronic control and monitoring devices as I can, so that I can figure out what is important and the best place to put things.  I need to wait till the batteries get installed - they come with a battery management system that requires a display monitor, so there's another thing to position somewhere. I also have decided to ditch the XP-based PC hardware computer idea - there are just too many pieces (motherboard, power supply, hard drive, video card, monitor, cables, etc.). I'm going to try something a lot more compact, more simple, more powerful, and way cooler - an iPad 2. I've already bought it. It is so cool.

I have a custom fiberglass dashboard and center console for the '74 SuperBeetle that I (painstakingly) found on the web. That will be my final dashboard, once I've driven the car for a little while.

No acorn mess today. No rat body. The trap is still set. Just one little rat turd.

More pictures:

Sunday, July 3, 2011

Still no Rat.

It's Sunday. No Rat. No Acorns. Been three days. Did he abandon his haven? Did he realize that I was on to him, and that he was no match for me, the very pinnacle of the evolutionary tree? Did he sulk off in dejected surrender forever, never to be seen again? Has he snatched victory from my hands, leaving me with a spiritually unfulfilled vendetta for the rest of my days? Am I taking this too seriously?

More progress - wired up the license plate light on the rear. I took out the dashboard to put on some final coats of stain and clear coat. I've been working on the 2-digit digital tachometer on the workbench with a function generator to check that it will work. I discovered that it will probably need a divide-by-2 circuit at the front end to accommodate the 4-pulses-per-revolution output of the Hairball. All this time I'm thinking that two little digits will not make for a good at-a-glance indication of motor RPM anyway (it's RPM  times 100) so I bought an analog tachometer at Pep Boys. I tried it on the workbench with the function generator and it works perfectly. I'm going to add it to the dashboard.

Thursday, June 30, 2011

Gene versus Rat update, and photos

Rat update - no rat this morning. Empty trap, empty sticky pads. Maybe if I clean out the acorn mess the rat will notice that things need dirtying up again.
Photos - here's some:

Wednesday, June 29, 2011

And I do have a stowaway...

Here's something you blog watchers can follow along with - who knows, it may go viral!

A few weeks ago I found a pile of chewed up acorns on the base pan of the motor compartment. Some animal had been eating in there, obviously. I vacuumed them out. Next day, same thing. Vacuumed them out again. And the next day, and the next...

I was getting tired of this. How was he/she/it getting in and out? There is a gap between the base pan and the bottom of the transaxle bell housing and I figured that this was where the critter was gaining access. I found some garden screen in the garage and covered up the opening. Did it work? No way, more acorns the next day.

I got some gopher pellets from the garage (we do seem to have a little of everything in there) and made a little pile. Did it work? Nyet. Pellets scattered around, more acorn mess. Guess they weren't tasty enough.

OK now this is getting to sound a little like Bill Murray and the gopher in Caddyshack (which I have not even SEEN, BTW). With a smirk on my face I decided that this had become somewhat of a personal challenge. My task is to outsmart the little whatever-it-is. I got a big ol' rat trap from the garage (yup, got those too), smeared some peanut butter on the trigger pad, and stuck a few peanuts in it for good measure.

Did it work? Nope. More acorns, trap still set. They were fresh peanuts, even. I figured this would eventually work, so I started checking it daily, moving it around a little in case the bugger had a set routine. Still acorns.

Then a couple days ago I opened up the hood to check on things, and there he was, looking at me. A rat. A few moments of man/rat eye contact, and he scampered off - behind the controller bulkhead! The single most inaccessible place in the whole car. I needed a new strategy since the trap wasn't working, and I was thinking about some new kind of poison. But then I realized that if this intruder ate poison and then went back behind the controller bulkhead to die, it would be stink city. Not what I want for my beautiful shiny newly completed electric car. So I got some mouse/rat sticky traps from Lowe's (apparently we were out of them in the garage) and set them out. Clever, huh.

Took a look this morning - more acorns, sticky traps still just like new. I'll try to update daily.

2011 update...

I know, been a long time since the last update...

Lots of progress that has gone on. The car is pretty much finished, with the exception of the traction battery pack. Recent activities:

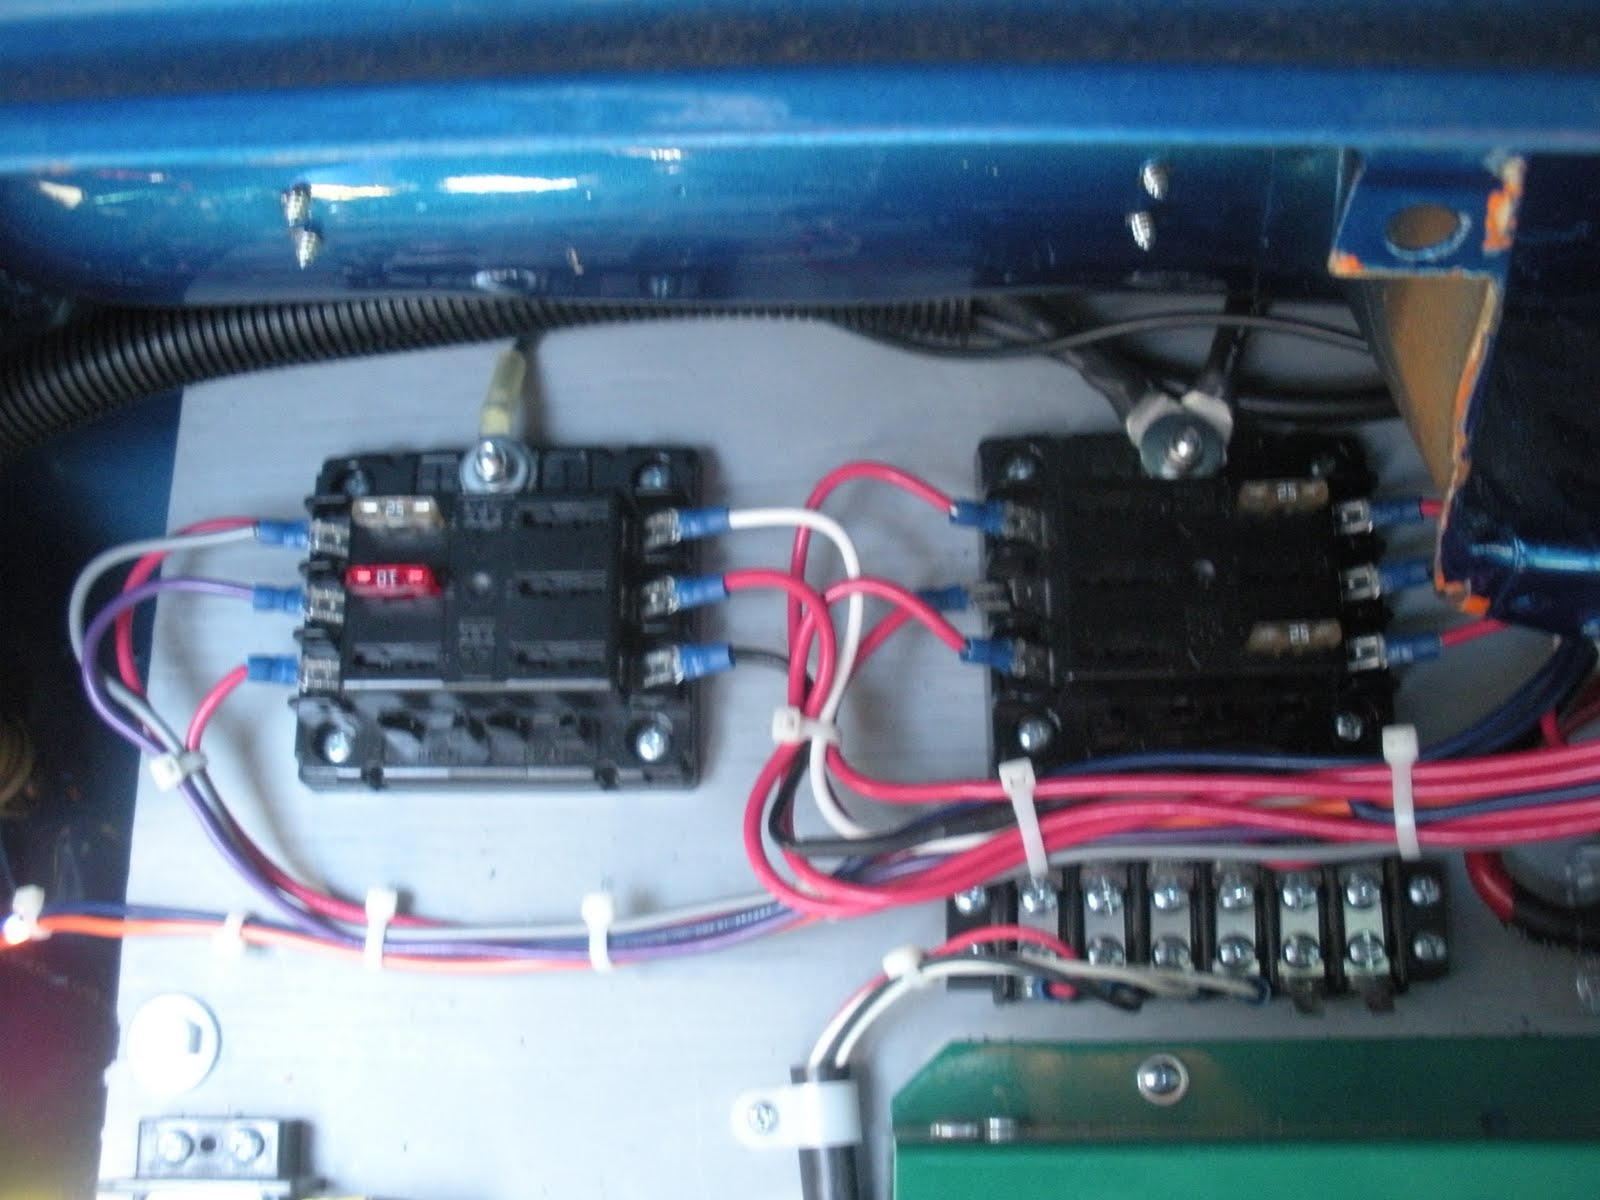
  • 12 volt fuse blocks and harnesses
  • Motor compartment finished
  • Motor compartment component relay board under rear seat built and installed
  • 12 volt battery cables, mounting, fusing, and top-off charger under rear seat
  • Temporary dashboard structure fabricated and installed
  • Temporary dashboard faceplate instrumentation installed and wired up
  • Carpets, door panels, window cranks, rear view mirror, and sun visors installed
  • Front seats installed
  • Headlight high beam control box installed
  • Charger door interlock switch installed

The 12 volt fuse assignments were created on the fly, with some functions ganged up on the same fuse to save space.

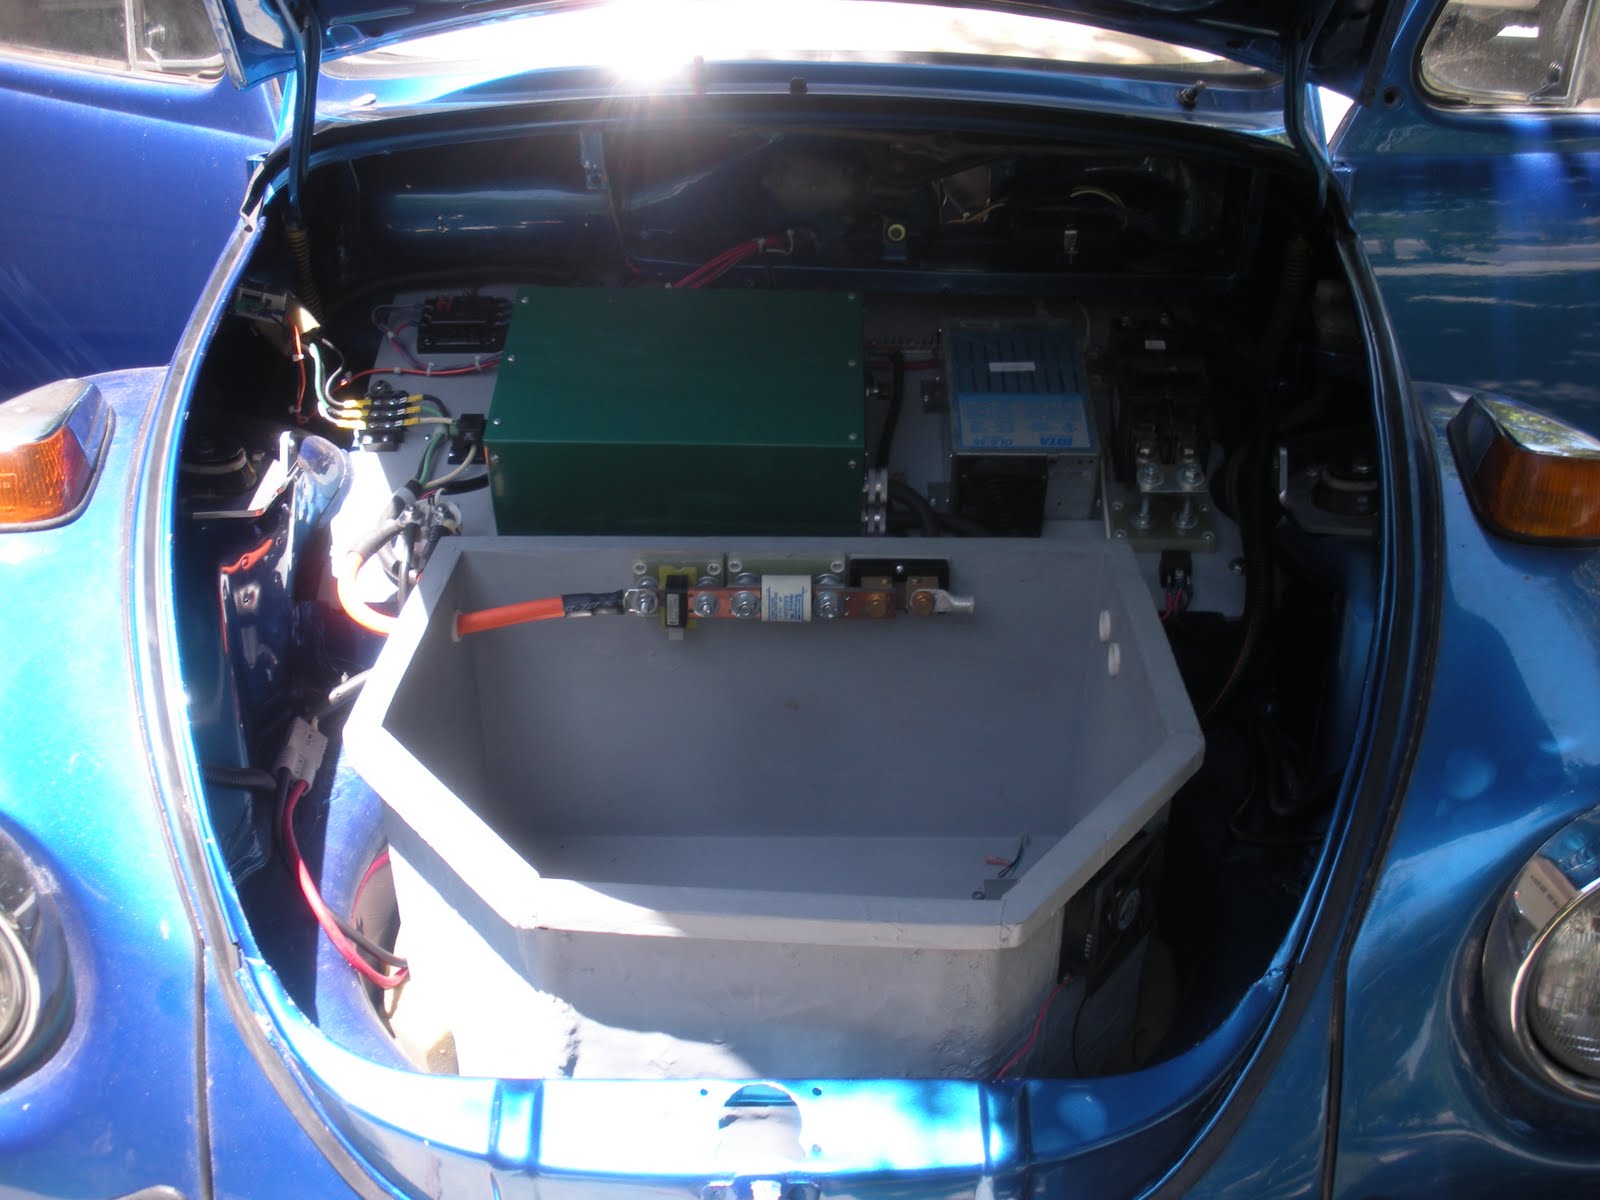
The motor compartment has everything in it - motor cooling blower, controller liquid cooling system, and moisture protection covers for the Zilla and Hairball.

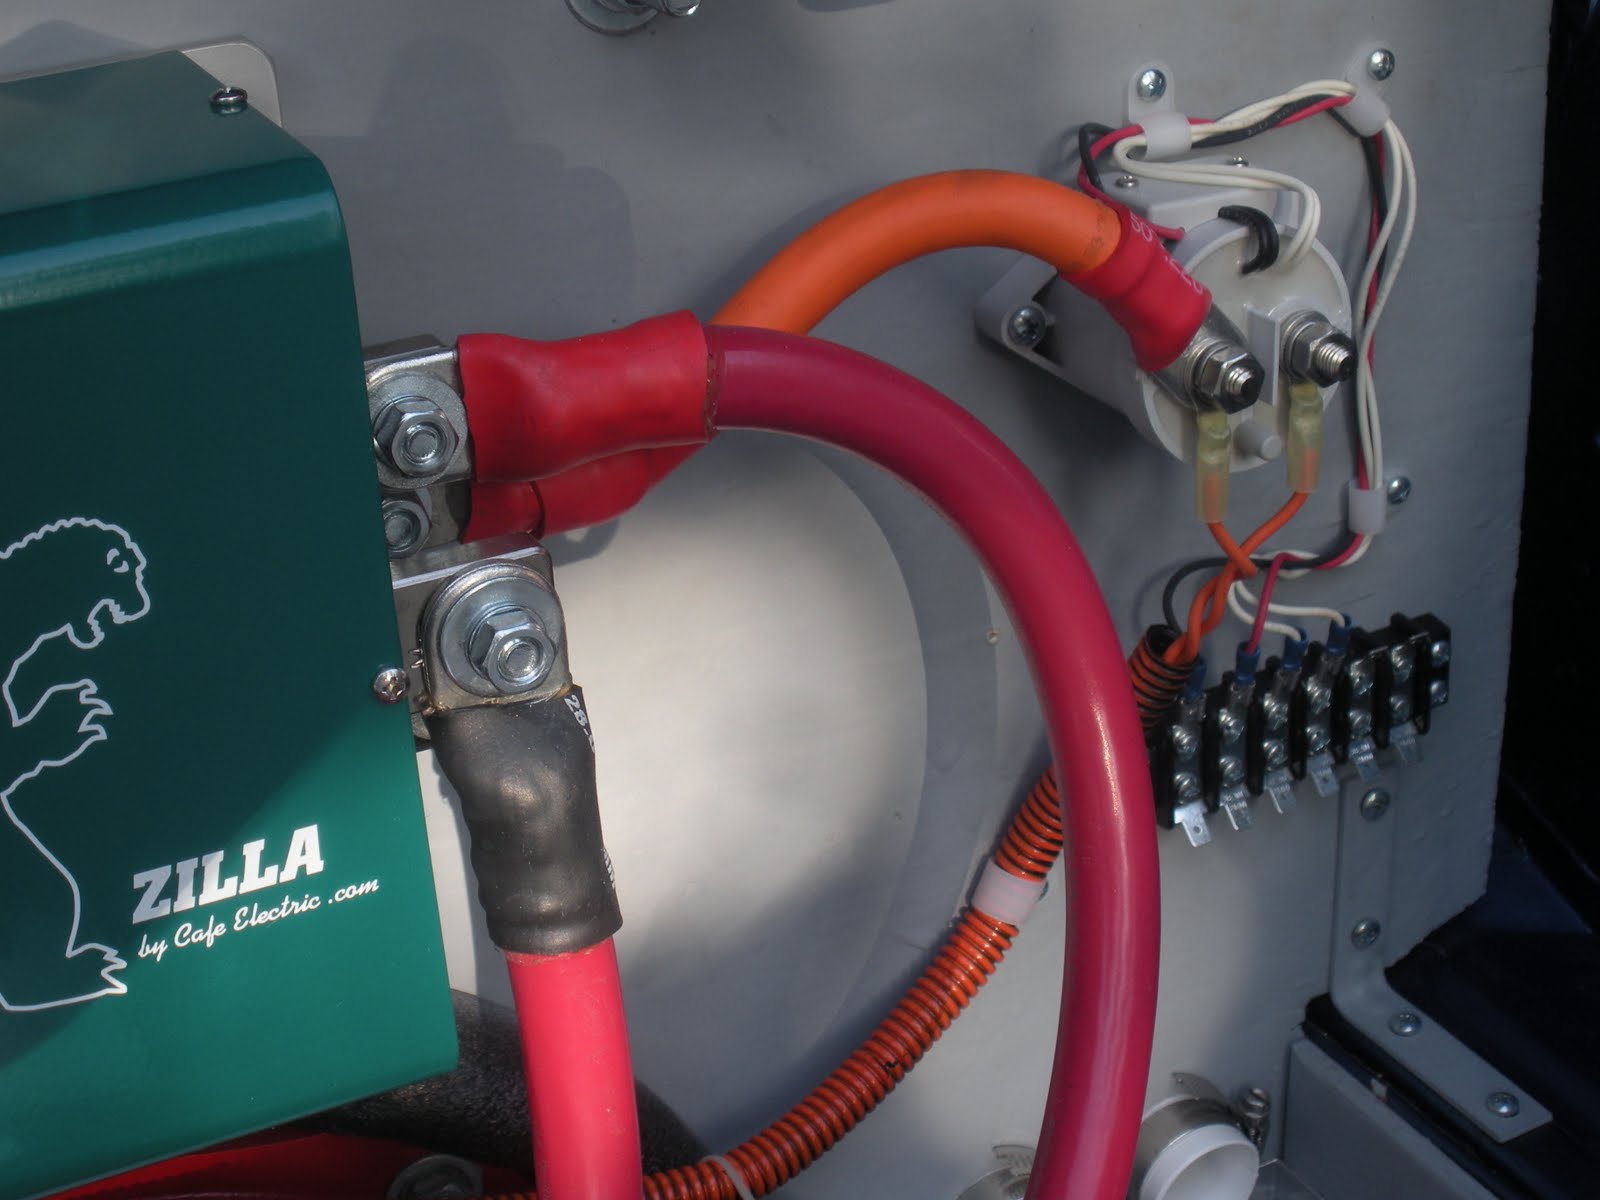
The motor compartment component relay board uses the Hairball main contactor control signal to fire off an intermediate relay that enables the main contactor, motor cooling blower, controller cooling system, and cooling system fans. Once the Hairball gets the Start signal from the iginition switch, and determines that all systems are functioning, it will turn on all of these things. When this happens, all the fan and pump noises will start. This will probably be the loudest thing about the car, except for tire noise when it's moving.

The 12 volt battery is an Optima blue top AGM, with a big honkin' ANL 100A fuse to protect all wirning.

The temporary dashboard structure is made out of wood and will hold the dashboard faceplate, that contains the (left to right) Link10 (always on), Speedometer with status LEDs, digital 12 volt system voltage meter (always on), digital RPM counter, DVM for motor amps, DVM for six LM34 temperature senders (locations TBD), the controller Valet switch, the rear window defroster switch, the Hazard switch, and the 12 volt accessory socket. I didn't add any heater or defroster hardware - I decided that I could use a portable heater/blower that could be placed where desired and powered off of the accessory socket (when not using a cell phone charger etc.).

Carpets, interior accessories, and the front seats all went in without a hitch.

The headlight dimmer switch is on the turn signal lever, and provides a short to ground whenever it's pulled towards the driver. To avoid having to hold the lever in the pulled position to keep the high beams on, I built a control box with a flip-flop for a pull-on, pull-off action. The box has a 2N3055 transistor driver for the high beam relay.

The charger door interlock switch is a microswitch mounted on a bracket that is activated by the position of the charger door (which used to be the gas cap door).

What else - oh yeah, pictures! Need to upload those next...

Also, I mailed off a check to Elite Power Solutions in Phoenix for the traction batteries and BMS. I'm going to use the 100ah 4-pack Lithium Ion GBS batteries. I decided to skip over the AGM idea and go for the gusto.

Friday, July 23, 2010

Incremental progress, and design changes...

Most days I don't get a chance to work on the car. Get home from work, clean the pool, find ticks on the dogs, go to marching band parent meetings, stuff like that. But, every morning and every evening I walk past the pile of parts on the garage workbench and I think about one pending task or another.

Recent progress - bolted in the front battery box. Ran 2/0 cable from front to back in the conduits. Ran 6ga cable from front to back in a third conduit for the charger connection to pack positive. Drilled a hole between the gas tank area and the dashboard area and ran wiring for the car lights into the dashboard area. Wired up the brake light switches. Wired up the reverse light switches.

Since I'm making this up as I go along, some design changes are inevitable. Install one thing, then install another thing, then install another thing ("this looks like it will fit here nicely"), then install another thing, and suddenly you think "uh oh, I'm kinda running out of room here". I'm going to put the 12v accessory battery where the original 12v battery goes (under the rear seat on the passenger side) and I was going to put the DC-DC converter under the rear seat on the driver's side. But I ran out of room in the motor compartment for the multiple relays that control the main contactor, coolant pump, radiator fans, and motor brush blower, so I decided to move the DC-DC converter up front next to the charger in the old gas tank area and put the relays under the rear seat. I was a little worried about the DC-DC converter under the seat anyway - under full load it will probably be giving off a lot of heat, and if some kid's butt is six inches above it, I'll probably get an earful of complaining.

The HV fuse block for the DC-DC was next to the Zilla, and now it's by the DC-DC up front. Now the mounting plate in the gas tank area is getting crowded...

More pictures next time.

Thursday, June 24, 2010

Slowly but surely...


I can't work on the car every day, but I am making some good progress. I made the wiring harnesses for the lights and brought them all together where the gas tank used to be. I still need to run the connections from the lighting harness into the dashboard area. Once I do that, I will install the front compartment component plate onto the gas tank mounting rails which will cover up the lighting harness terminal strip. I figure that once the lights are working from the dashboard harness, I won't need to mess with it again and I can cover it up.

I also installed the Link 10 shunt, 500A fuse, and PakTrakr Hall Effect shunt on the wall of the front battery box. The components are bolted to phenolic blocks and connected to each other with heavy copper busbar stock.


I also have been wiring up the components in the motor compartment. I crimped and heatshrinked the 4/0 motor cables and the 2/0 contactor cables. The connections to the Hairball are brought out to a terminal strip. The cooling system component hoses were installed - that blue thing is the coolant reservior. The Hall Effect accelerator pedal and motor RPM sensor cables are connected directly onto the Hairball. I put the orange main contactor precharge wires in a split-loom tube that I spray-painted orange. In electric cars, you're supposed to have the high-voltage cables colored orange. Policemen and firemen have been trained that orange means high voltage, so if there's an accident they know to not cut those cables. I hung the split loom from a tree branch in the front yard to paint it.


Tuesday, May 4, 2010

Progress so far...

Did some more work on Sunday. I installed the controller and cooling system to test fit things.


The green box above the motor is the Zilla power section. The green box to the left is the Hairball. The blue thing to the left of that is the coolant reservoir. On the bottom of the compartment to the left of the motor are the coolant pump and the radiator (with two fans).


Here's some shots (including a finger) of the liquid-tight conduits that run from the motor compartment to the trunk up front:


You can see the ends of the conduits near the bottom of the motor compartment. Also I ran four pool vacuum hose extensions from the motor compartment to the old heater duct holes under the rear seat, to provide routing for all the wires that need to go up to the front of the car.


In the 4/0 cable loop between the brush end of the motor and the field terminals is the 600A hall-effect current sensor.

Friday, April 30, 2010

Still working on it...

In high-tech manufacturing terminology, it can be said that I am in the process of creating the subassemblies that will go together to make the car. The high-current fuses and hall effect current sensors have been mounted on phenolic blocks to give them mechanical stability. The controller liquid cooling radiator has been mounted in an aluminum frame so that it can be positioned on the bottom plate of the motor compartment. Of course to do all this it would take too long to use a hacksaw, so I got me a new bandsaw (thanks Harbor Freight) (again).

Whenever I get a spare couple of hours contiguous (not common during girl's softball season) I set up a little production line in the garage.


I have also installed the hall effect accelerator pedal. I noticed that it's the identical part to the pedal assembly in my wife's Highlander Hybrid (and probably the Toyota Prius too).


Hey look, the cable runs down the original throttle cable tube. Cool huh.

The rear battery box is installed and bolted in, and the front battery box is mostly done. The four liquid-tight conduits running under the car from the front to the back are installed. I did a cable-pulling test (actually cable-pushing test) with the 2/0 orange welding cable and it snakes through easily. I built my first high current cable, about one foot long 4/0 between one motor terminal and a hall effect current sensor (in the armature/field loop of the motor) to test my cable-crimping abilities. A lot of crimping force is needed but it's not unmanageable. Shelley was fascinated by the heat shrink process.

Rear battery box: