Most days I don't get a chance to work on the car. Get home from work, clean the pool, find ticks on the dogs, go to marching band parent meetings, stuff like that. But, every morning and every evening I walk past the pile of parts on the garage workbench and I think about one pending task or another.
Recent progress - bolted in the front battery box. Ran 2/0 cable from front to back in the conduits. Ran 6ga cable from front to back in a third conduit for the charger connection to pack positive. Drilled a hole between the gas tank area and the dashboard area and ran wiring for the car lights into the dashboard area. Wired up the brake light switches. Wired up the reverse light switches.
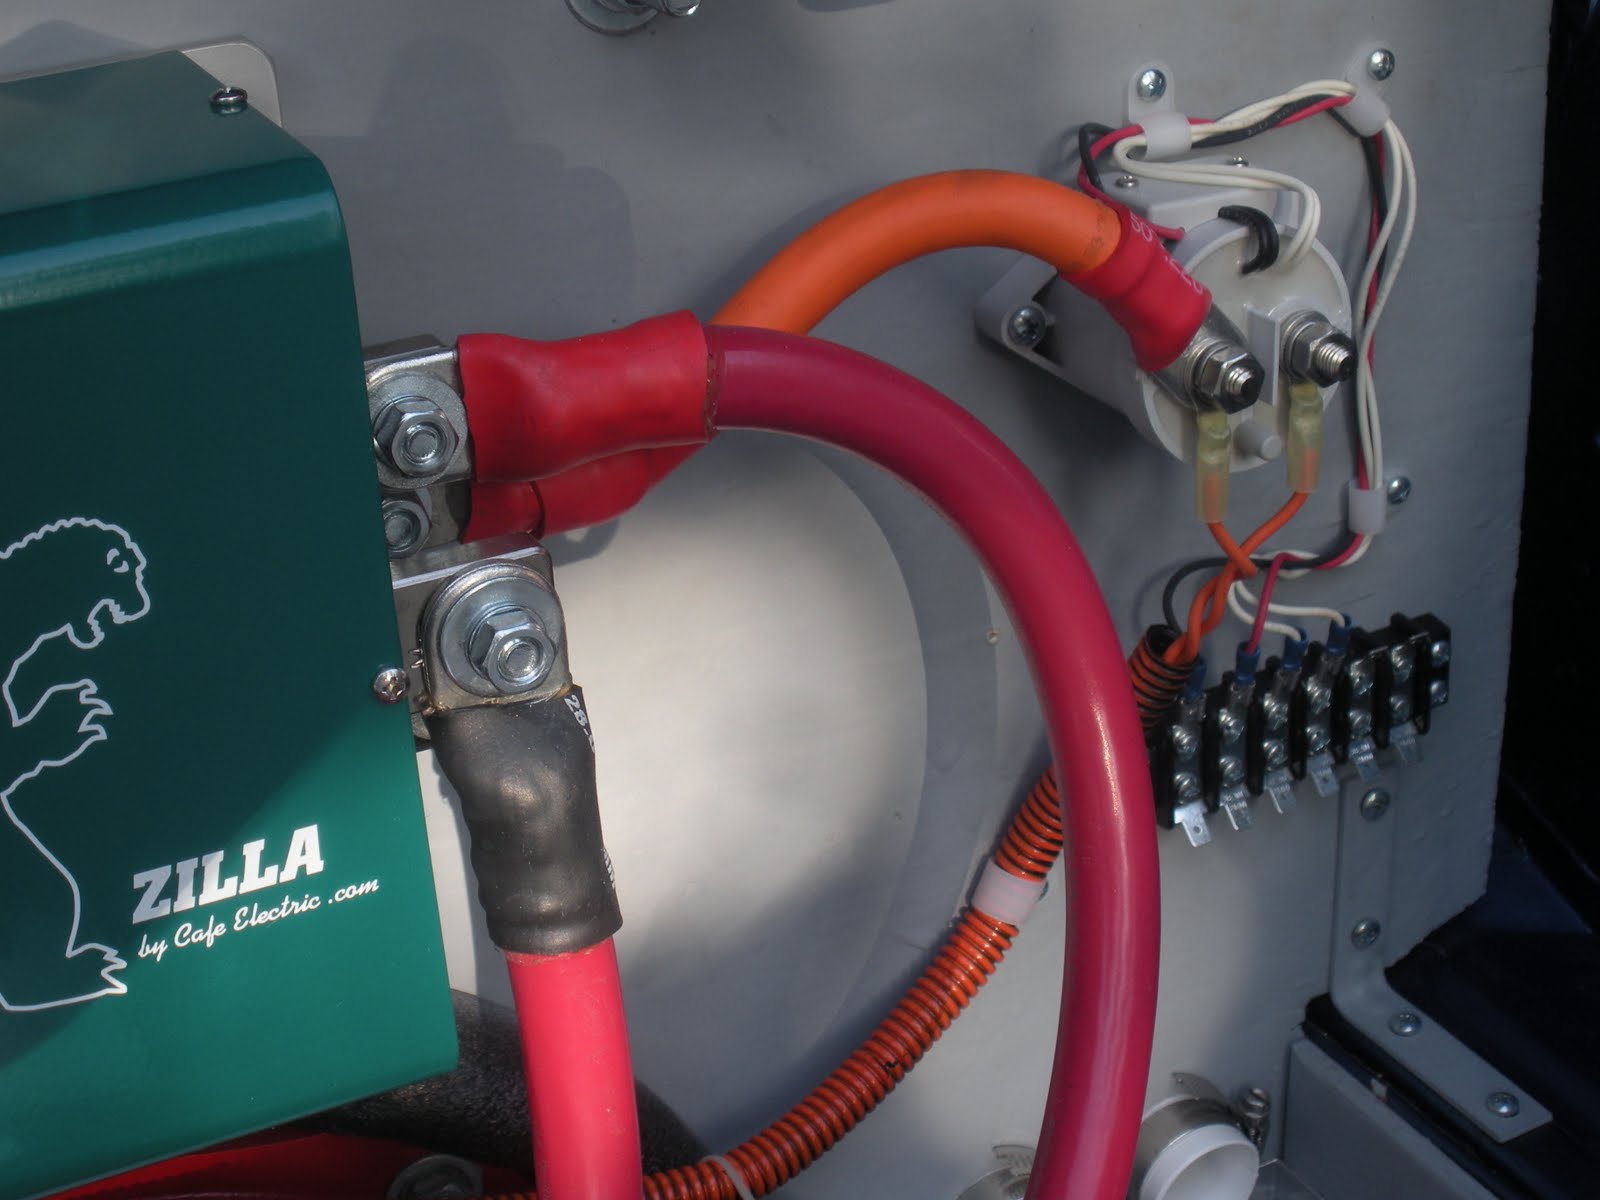
Since I'm making this up as I go along, some design changes are inevitable. Install one thing, then install another thing, then install another thing ("this looks like it will fit here nicely"), then install another thing, and suddenly you think "uh oh, I'm kinda running out of room here". I'm going to put the 12v accessory battery where the original 12v battery goes (under the rear seat on the passenger side) and I was going to put the DC-DC converter under the rear seat on the driver's side. But I ran out of room in the motor compartment for the multiple relays that control the main contactor, coolant pump, radiator fans, and motor brush blower, so I decided to move the DC-DC converter up front next to the charger in the old gas tank area and put the relays under the rear seat. I was a little worried about the DC-DC converter under the seat anyway - under full load it will probably be giving off a lot of heat, and if some kid's butt is six inches above it, I'll probably get an earful of complaining.
The HV fuse block for the DC-DC was next to the Zilla, and now it's by the DC-DC up front. Now the mounting plate in the gas tank area is getting crowded...
More pictures next time.
Friday, July 23, 2010
Thursday, June 24, 2010
Slowly but surely...


I can't work on the car every day, but I am making some good progress. I made the wiring harnesses for the lights and brought them all together where the gas tank used to be. I still need to run the connections from the lighting harness into the dashboard area. Once I do that, I will install the front compartment component plate onto the gas tank mounting rails which will cover up the lighting harness terminal strip. I figure that once the lights are working from the dashboard harness, I won't need to mess with it again and I can cover it up.
I also installed the Link 10 shunt, 500A fuse, and PakTrakr Hall Effect shunt on the wall of the front battery box. The components are bolted to phenolic blocks and connected to each other with heavy copper busbar stock.

I also have been wiring up the components in the motor compartment. I crimped and heatshrinked the 4/0 motor cables and the 2/0 contactor cables. The connections to the Hairball are brought out to a terminal strip. The cooling system component hoses were installed - that blue thing is the coolant reservior. The Hall Effect accelerator pedal and motor RPM sensor cables are connected directly onto the Hairball. I put the orange main contactor precharge wires in a split-loom tube that I spray-painted orange. In electric cars, you're supposed to have the high-voltage cables colored orange. Policemen and firemen have been trained that orange means high voltage, so if there's an accident they know to not cut those cables. I hung the split loom from a tree branch in the front yard to paint it.


Tuesday, May 4, 2010
Progress so far...
Did some more work on Sunday. I installed the controller and cooling system to test fit things.


The green box above the motor is the Zilla power section. The green box to the left is the Hairball. The blue thing to the left of that is the coolant reservoir. On the bottom of the compartment to the left of the motor are the coolant pump and the radiator (with two fans).

Here's some shots (including a finger) of the liquid-tight conduits that run from the motor compartment to the trunk up front:


You can see the ends of the conduits near the bottom of the motor compartment. Also I ran four pool vacuum hose extensions from the motor compartment to the old heater duct holes under the rear seat, to provide routing for all the wires that need to go up to the front of the car.

In the 4/0 cable loop between the brush end of the motor and the field terminals is the 600A hall-effect current sensor.
Friday, April 30, 2010
Still working on it...
In high-tech manufacturing terminology, it can be said that I am in the process of creating the subassemblies that will go together to make the car. The high-current fuses and hall effect current sensors have been mounted on phenolic blocks to give them mechanical stability. The controller liquid cooling radiator has been mounted in an aluminum frame so that it can be positioned on the bottom plate of the motor compartment. Of course to do all this it would take too long to use a hacksaw, so I got me a new bandsaw (thanks Harbor Freight) (again).
Whenever I get a spare couple of hours contiguous (not common during girl's softball season) I set up a little production line in the garage.


I have also installed the hall effect accelerator pedal. I noticed that it's the identical part to the pedal assembly in my wife's Highlander Hybrid (and probably the Toyota Prius too).

The rear battery box is installed and bolted in, and the front battery box is mostly done. The four liquid-tight conduits running under the car from the front to the back are installed. I did a cable-pulling test (actually cable-pushing test) with the 2/0 orange welding cable and it snakes through easily. I built my first high current cable, about one foot long 4/0 between one motor terminal and a hall effect current sensor (in the armature/field loop of the motor) to test my cable-crimping abilities. A lot of crimping force is needed but it's not unmanageable. Shelley was fascinated by the heat shrink process.
Rear battery box:


Whenever I get a spare couple of hours contiguous (not common during girl's softball season) I set up a little production line in the garage.


Hey look, the cable runs down the original throttle cable tube. Cool huh.
Rear battery box:


Friday, January 22, 2010

Subscribe to:
Posts (Atom)